...
Watch: Update your Availability in the BART Team App
Availability Module
Weekly Tab
The ‘Weekly’ tab will be open by default when you tap on ‘Availability’ from the main bottom menu.
In the weekly tab, you will see a table which is split up into days and hourly blocks. By tapping on a block, you will change your availability status for the corresponding day and hour.
Status Cycle
By default the status cycle option will be selected, which will set a specific status depending on the number of times you have tapped a cell:
Tapping a block once will make it green, which indicates that you are available
Tapping a block twice will turn it red, indicating that you’re not available during this time-slot
Tapping a block a third time will turn it purple, which indicates that you are on premises
Tapping a block a fourth time will turn it yellow, which indicates that you are a delayed response greater than 20 minutes
Tapping a block a fifth time will turn it orange, which indicates that you are available for Emergencies only (ie. Section 44’s, State of Emergencies)
...
Status Picker
You can also select a specific status instead of cycling through, by using the ‘Status Picker’ option.
Tap on the 'Availability' item in the main bottom menu

The 'Weekly Tab' will be open by default


Tap on the ‘Status Picker’ paintbrush icon in the top left-hand corner of the table:

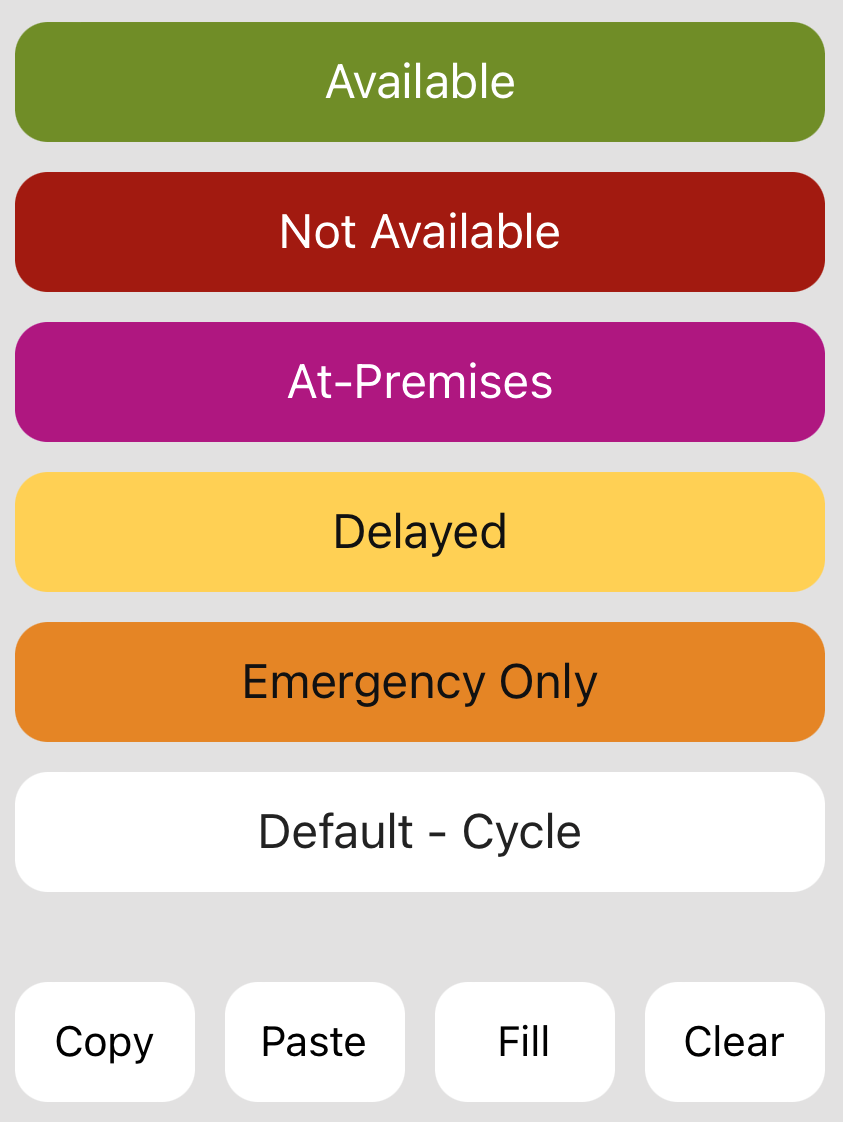
A popup will appear, listing each availability status - select a status from the list

Tap on your choice of table cells for any time and day, and your selected status will be set
| Info |
|---|
Please Note: You can use the status picker to select the classic ‘Default - Cycle’ option. |
Status Picker Options
Within the status picker popup, you can also select from some additional options:
Copy (will copy the availability for the entire week, which can then be pasted for future weeks)
Paste (is only available if you have copied the status template first)
Fill (Fill the entire week with a specific status - select from: Available, Unavailable, At-Premises, Delayed, Emergency Only)
Clear (will clear the entire week)
...
Set Tab
Tap on 'Availability' in the main bottom menu


The ‘Weekly' tab will be open by default - tap on the 'Set’ tab
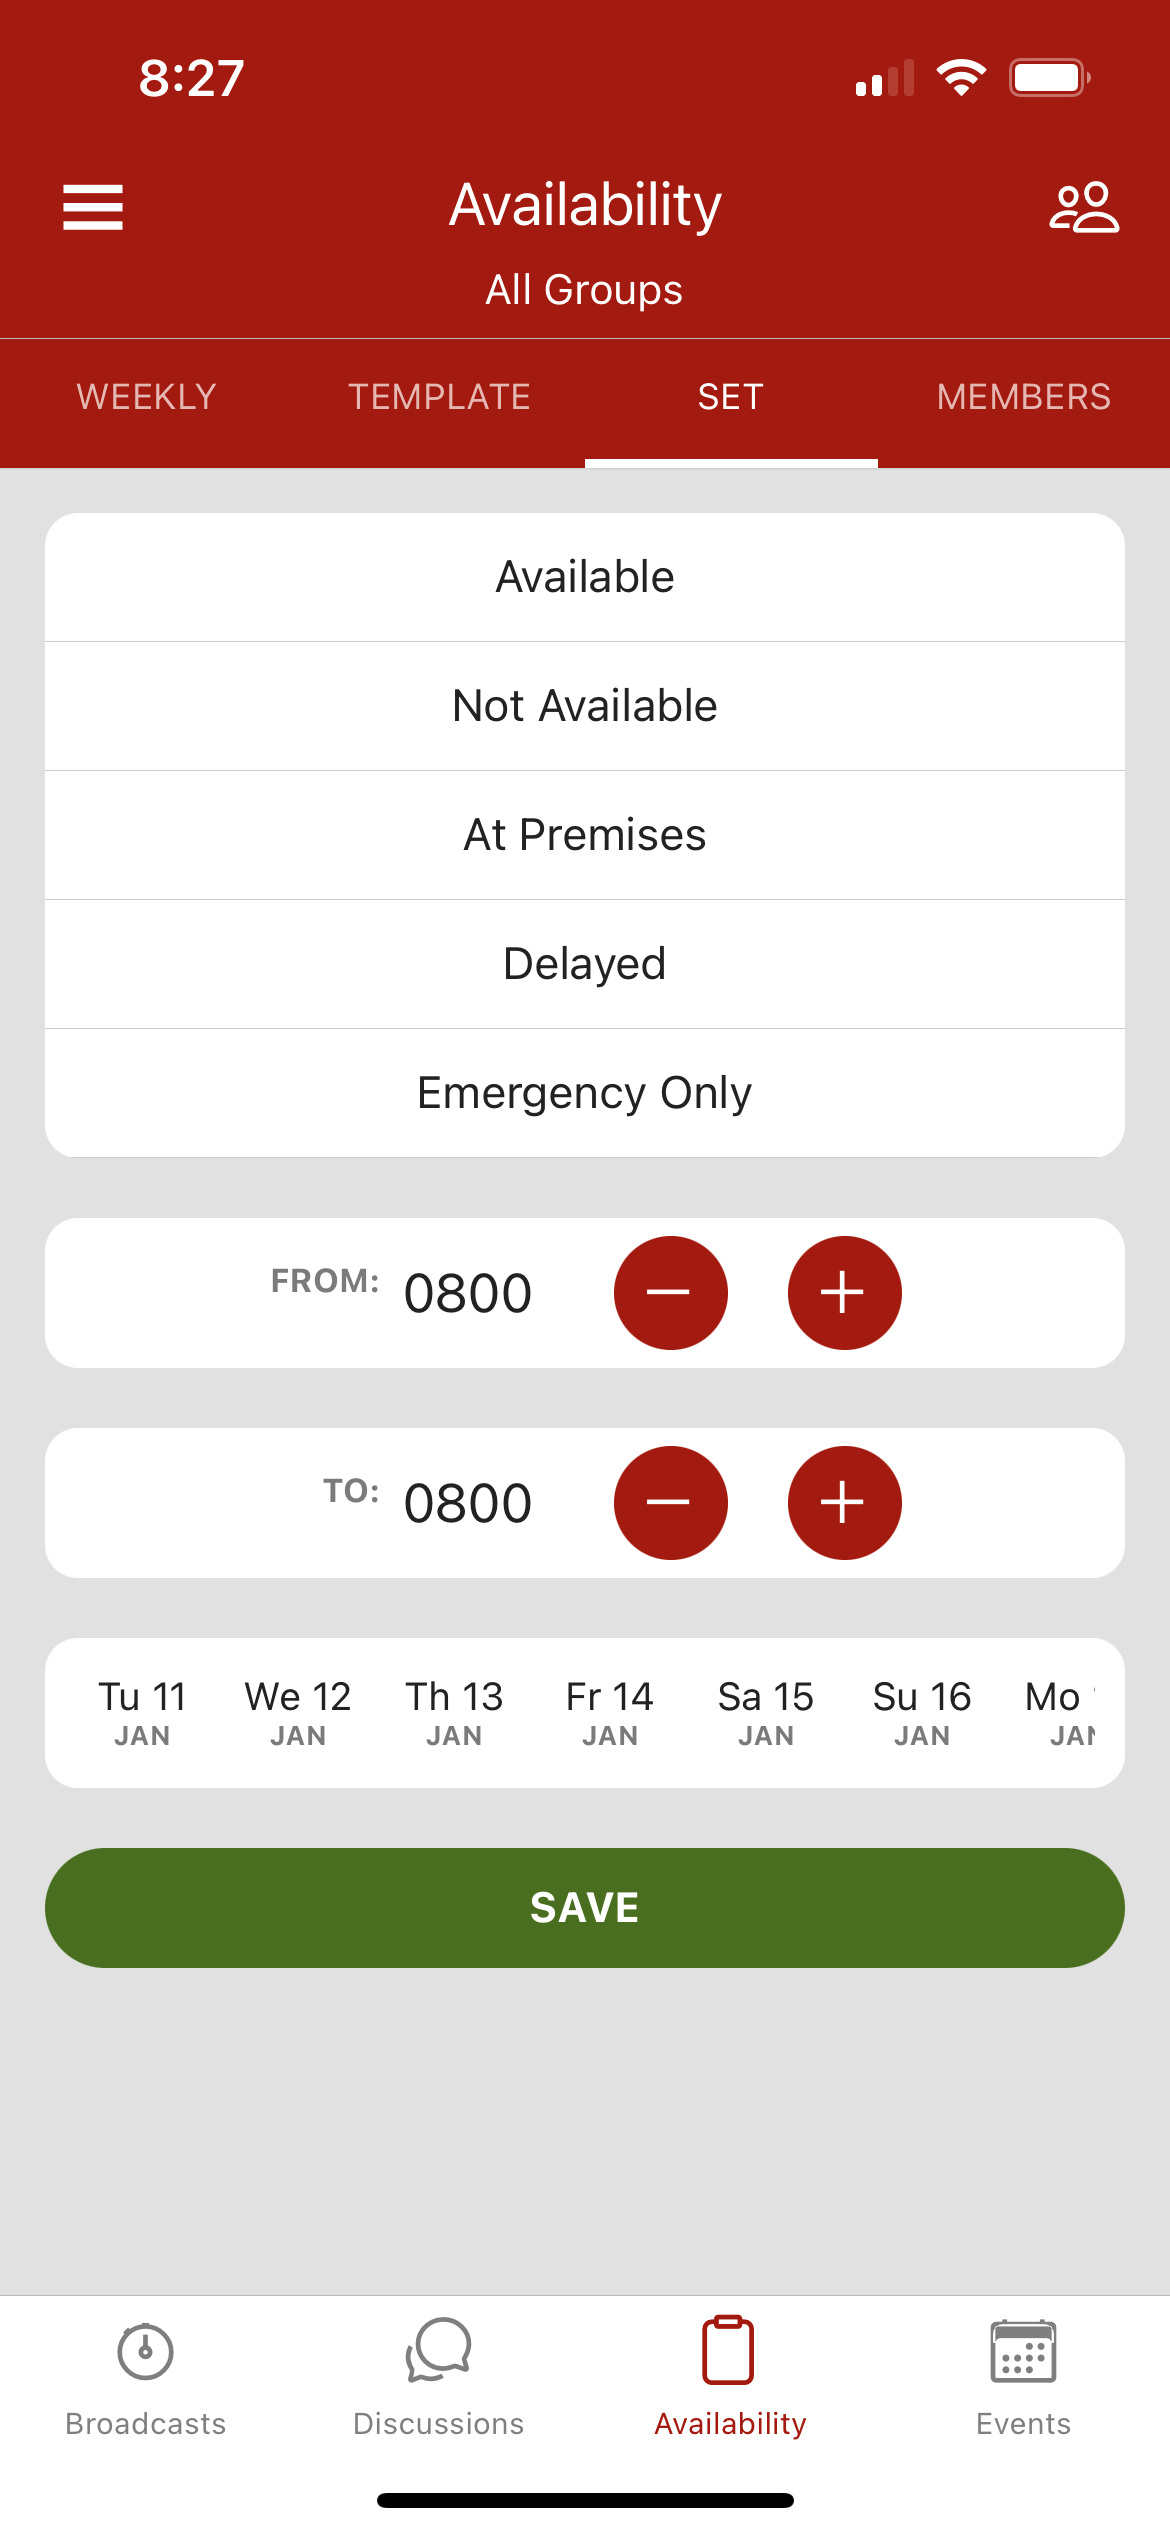

Tap on the status you wish to set:
Available
Not-Available
At Premises
Delayed
Emergency Only
Set the start time in the ‘From’ row
Set the end time in the ‘To’ row
Select a date – you can select multiple days, and can hold and drag the date list to view more dates
Tap on the green ‘Save’ button
View Members
To view the availability of your team mates, tap on the ‘Members’ tab at the top of the screen. A list of members within your group will appear, along with coloured blocks indicating what their status is for each hour within a day. You can flick through days by using the white arrows on either side of the date.
...