| Table of Contents | ||
|---|---|---|
|
...
Overview
The Administration area within the Members Web App is the place where most administrative tasks are completed.
...
| Info |
|---|
Please Note: You must have administrator permissions in order to access this area of the Members Web App. |
...
Members
Add a New Member to your Group
1. Navigate to the ‘Administration’ item within the main menu and hover over with your mouse
...
For more information on setting up new or existing members, please see 'Administrator Tasks'.
Add an Existing Member to your Group
1. Navigate to the ‘Administration’ item within the main menu and hover over with your mouse
...
- Check that their Profile Information is correct
- Set the appropriate Permissions
- Assign the members Qualifications
- Ensure they have (read / write) access to the correct Broadcast Tags
- Ensure they have access to the correct Groups
Import a List of Members
1. Navigate to the ‘Administration’ item within the main menu and hover over with your mouse
...
10. You can either:
a. Upload your document (by pressing on ‘browse’ and selecting it from your computer)
b. Copy the data out of the csv and paste it in the text box provided
Setup or modify your Members
1. Navigate to the ‘Administration’ item within the main menu and hover over with your mouse
...
6. A popup dialogue box will display, with 7 tab options:
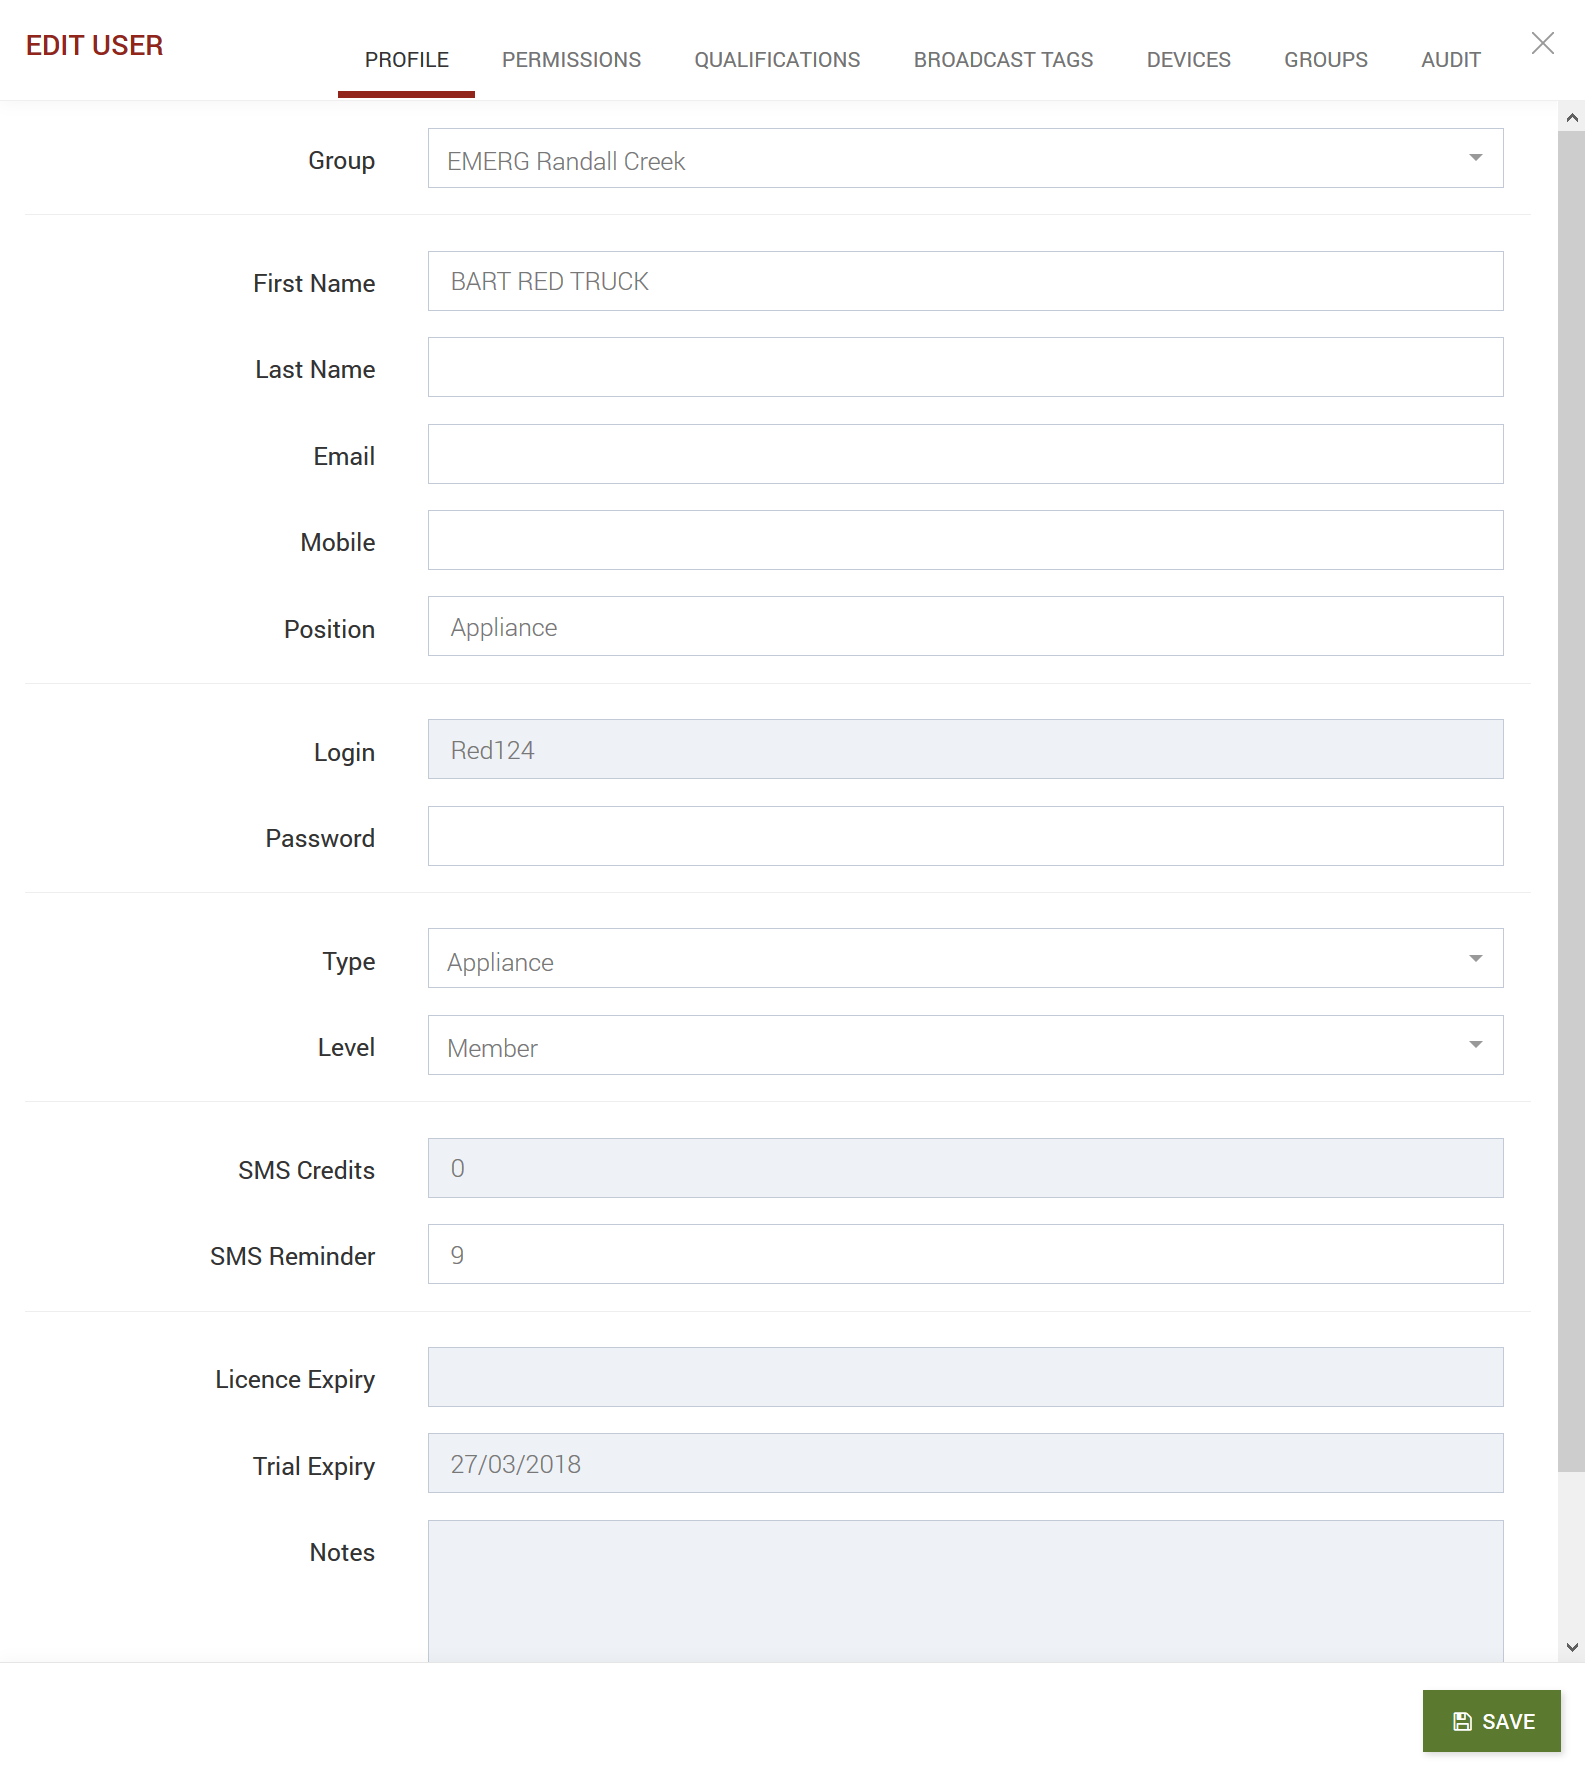
Profile
- Most of the information listed on the ‘Profile’ tab would have been entered whilst creating or adding your new member
- Check over the fields already filled out, and enter in any additional information required
- Assign SMS Credits (if required)
- Check the members License Expiry
- Add Notes (if required)
Permissions (General)
Private Mobile
Is the mobile phone number provided private?
Send Broadcast
Is the member able to send out broadcasts to the group?
SMS Send Instructions
If the member is using a non-smartphone, do they require instructions on how to respond (provided within the SMS)
Edit Broadcast
Is the member able to modify broadcasts, after they have been sent out to the group?
Permissions (Group)
Default Group
Do you want to set the group as ‘Default’?
Observer Only
Do you want the member to only view Broadcasts and not respond to them?
Create Events
Is the member able to create and edit events?
Close Incidents
Is the member able to close incidents?
Email Reports
Do you want the member to receive reports via email, once a Broadcast has been closed?
Low Balance Reminders
Do you want the member to be reminded when the SMS balance is low?
Account Manager
Is the member an account manager?
Qualifications
Use the On/ Off toggles at the end of each row to enable or disable the members qualifications.
Broadcast Tags
Within this tab you will see a list of each available Broadcast Tag.
- Access: Control access using the On/ Off toggles
- SMS: Select whether they are to receive SMS’ or not (only available with a valid mobile phone number)
- Email: Select whether they are to receive Emails (non-alerts only, alerts-only, all notifications)
- Push: Select whether they are to receive Push Notifications (non-alerts only, alerts-only, all notifications)
Groups
Within this tab you can control the Groups in which the member belongs to:
- Add a new group
- See the Status of the membership type
- Whether or not a group is set as default
- Whether a group is Active or not
How to Accept or Reject Membership Requests
1. Navigate to the ‘Administration’ item within the main menu and hover over with your mouse
...
5. Select either the ‘Accept’ or ‘Decline’ buttons for any or all of the membership requests listed

Remove a Member's License
1. Navigate to the ‘Administration’ item within the main menu and hover over with your mouse
...
![]()
5. Click on the red circle for each member license you wish to remove
Groups
Add a New Group
1. Navigate to the ‘Administration’ item within the main menu and hover over with your mouse
...
6. Press on the green ‘Create’ button
Add an Existing Member to a Group
1. Navigate to the ‘Administration’ item within the main menu and hover over with your mouse
...
8. Click on the member that you would like to add
Create a New Member and Add it to a Group
1. Navigate to the ‘Administration’ item within the main menu and hover over with your mouse
...
- Check that their Profile Information is correct
- Set the appropriate Permissions
- Assign the members Qualifications
- Ensure they have (read / write) access to the correct Broadcast Tags
- Ensure they have access to the correct Groups
Delete a Group
1. Navigate to the ‘Administration’ item within the main menu and hover over with your mouse
...
4. At the end of each row there is a delete button; press on the red circle X to delete your chosen group
![]()
...
Broadcast Tags
Create a New Broadcast Tag
1. Navigate to the ‘Administration’ item within the main menu and hover over with your mouse
...
8. Press on the green ‘Save’ button at the bottom of the dialogue box
Edit an Existing Broadcast Tag
1. Navigate to the ‘Administration’ item within the main menu and hover over with your mouse
...
7. When you’ve finished your edits, press on the green ‘Save’ button
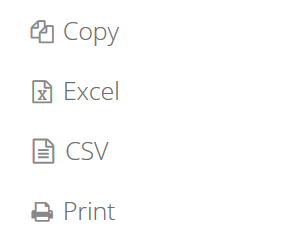
Export Broadcast Tags
1. Navigate to the ‘Administration’ item within the main menu and hover over with your mouse
...
6. Choose from either Excel or CSV formats, and the list of Broadcast Tags will be saved automatically into your default download location
...
Markers
Add a New Marker
1. Navigate to the ‘Administration’ item within the main menu and hover over with your mouse
...
8. Press on the green ‘Save’ button
Import a List of Markers
1. Navigate to the ‘Administration’ item within the main menu and hover over with your mouse
...
11. After your Map Markers have been successfully imported, you will see a confirmation message
Edit Details of an Existing Marker
1. Navigate to the ‘Administration’ item within the main menu and hover over with your mouse
...
6. Change the existing details as required, and press on the green ‘Save’ button
Export Markers
1. Navigate to the ‘Administration’ item within the main menu and hover over with your mouse
...
6. Choose from either Excel or CSV formats, and the list of Map Markers will be saved automatically into your default download location
...
Resources
Add a New Resource
1. Navigate to the ‘Administration’ item within the main menu and hover over with your mouse
...
7. Press on the green ‘Create’ button
Edit an Existing Resource
1. Navigate to the ‘Administration’ item within the main menu and hover over with your mouse
...
6. Modify the fields as required, and press on the green ‘Save’ button
Delete a Resource
1. Navigate to the ‘Administration’ item within the main menu and hover over with your mouse
...
5. A popup modal dialogue box will appear, asking if you’re sure you wish to delete the resource – press on the green ‘Delete’ button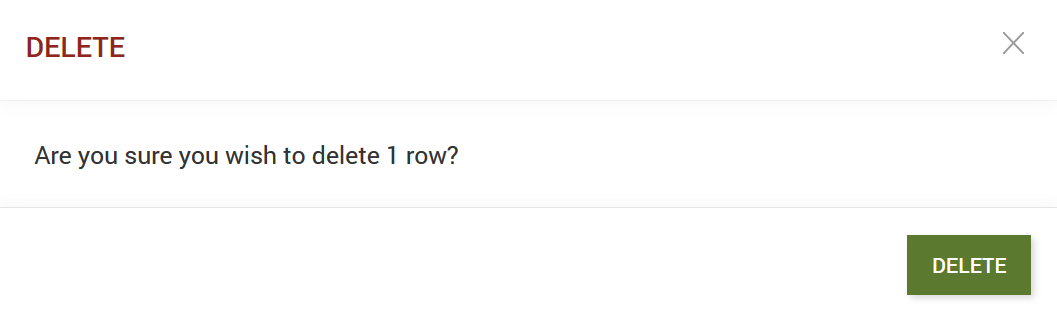
Export a List of Resources
1. Navigate to the ‘Administration’ item within the main menu and hover over with your mouse
...
6. Choose from either Excel or CSV formats, and the list of Resources will be saved automatically into your default download location
...
SMS
Purchase SMS Credits
1. Navigate to the ‘Administration’ item within the main menu and hover over with your mouse
...
8. Select your preferred payment method and press on the blue ‘Next’ button
PayPal/ Credit Card

If you have selected this option, you will be taken to the secure PayPal checkout screen. Follow the prompts and complete your order.
Cheque
If you have selected the cheque payment option, you will be taken to the order completion page. Please take note of the:
...
Fill in all the applicable billing details, and press on the green ‘Complete’ button. Your invoice will be emailed to the address entered within the ‘Invoice Details’.
Bank Deposit
If you have selected the bank deposit option, you will be taken to the order completion page. Please take note of the:
...
Fill in all applicable billing details, and press on the green ‘Complete’ button.
After the purchase has been completed, you will have the option of downloading your invoice.
View SMS Purchase History
1. Navigate to the ‘Administration’ item within the main menu and hover over with your mouse
...