Turnout Dashboard
Introduction
The Turnout module focuses on Zone and District incidents, handling multiple brigades, units and groups within the same interface. This application provides those who are dispatching the message or managing multiple groups the ability to see real time brigade, unit, and group responses, as well as vehicle deployment on the map.
Overview
Incident List
When logging in with your BART credentials, you will either see the incident list view, the map view, or both - like in the example below:
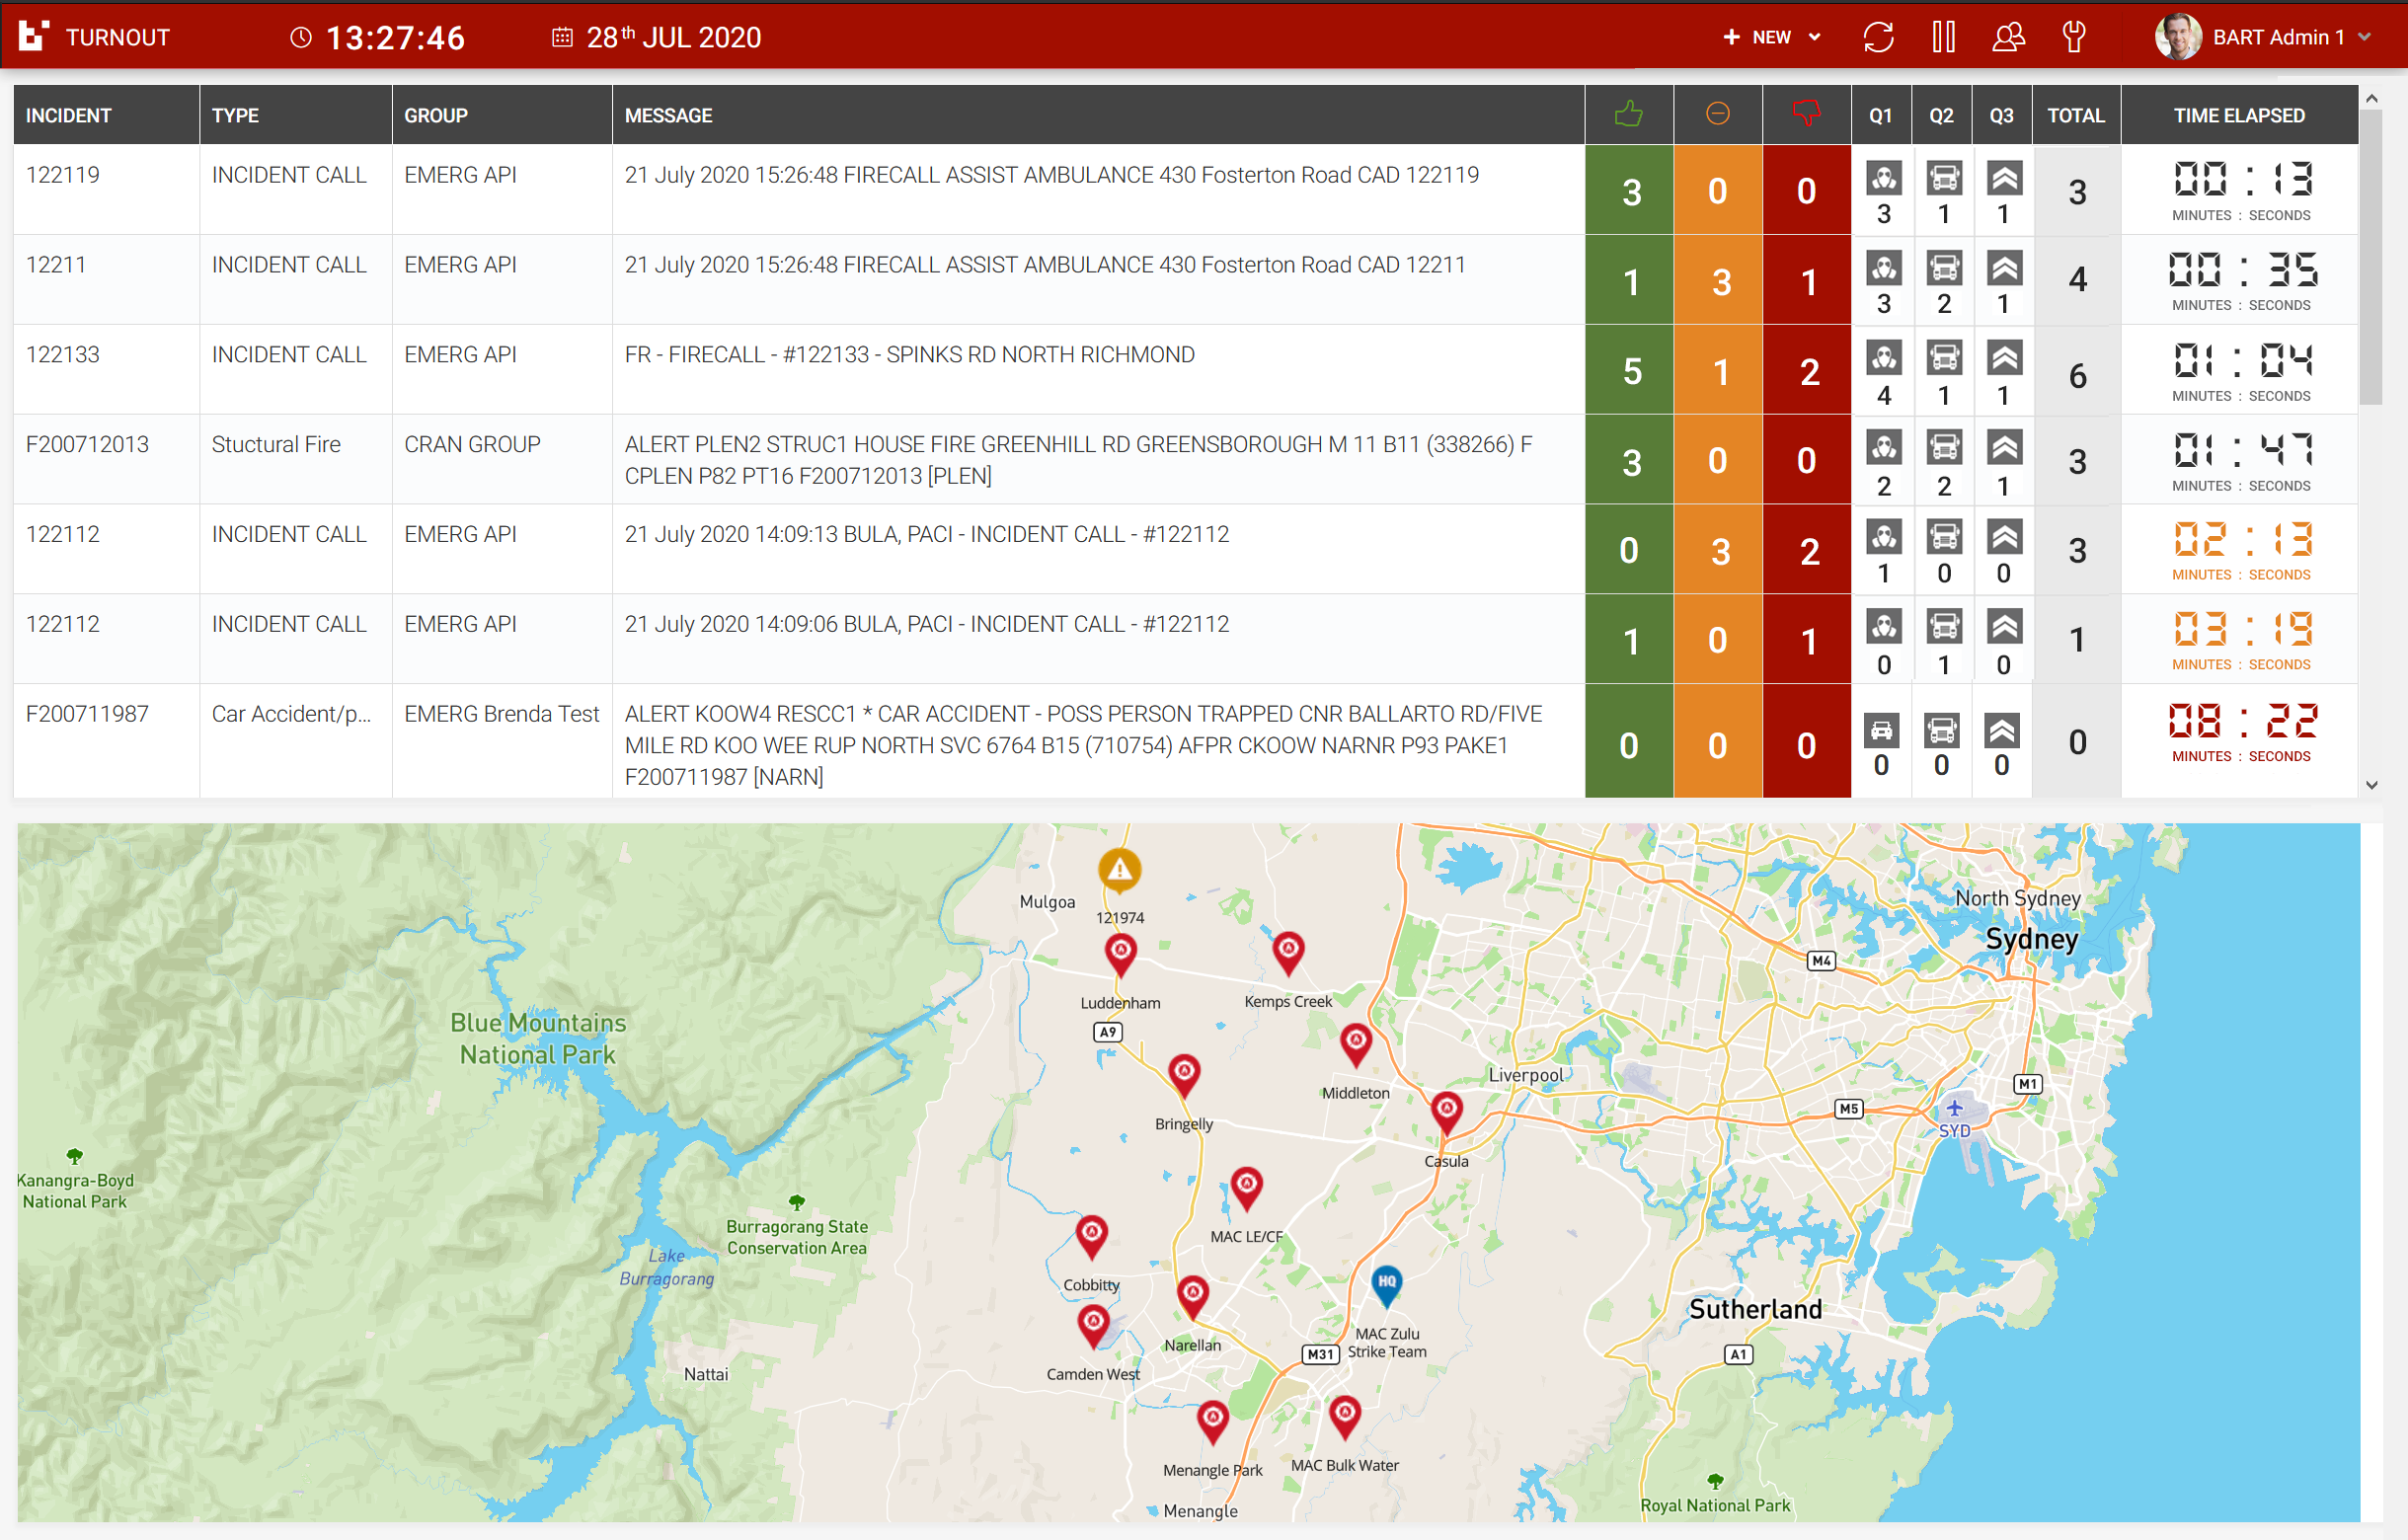
In the incident list table, you will see the:
- Incident reference (if available)
- Type of incident
- Group
- Message
- Numbers of members who have accepted, declined or other
- Top 3 group qualifications
- Total number of members in the group
- Time elapsed since creation
If a period of 2 minutes has elapsed without any members attending the incident, then the incident 'Time Elapsed' will be highlighted in yellow.
If a period of 4 minutes has elapsed without any members attending the incident, then the incident 'Time Elapsed' will be highlighted in red.
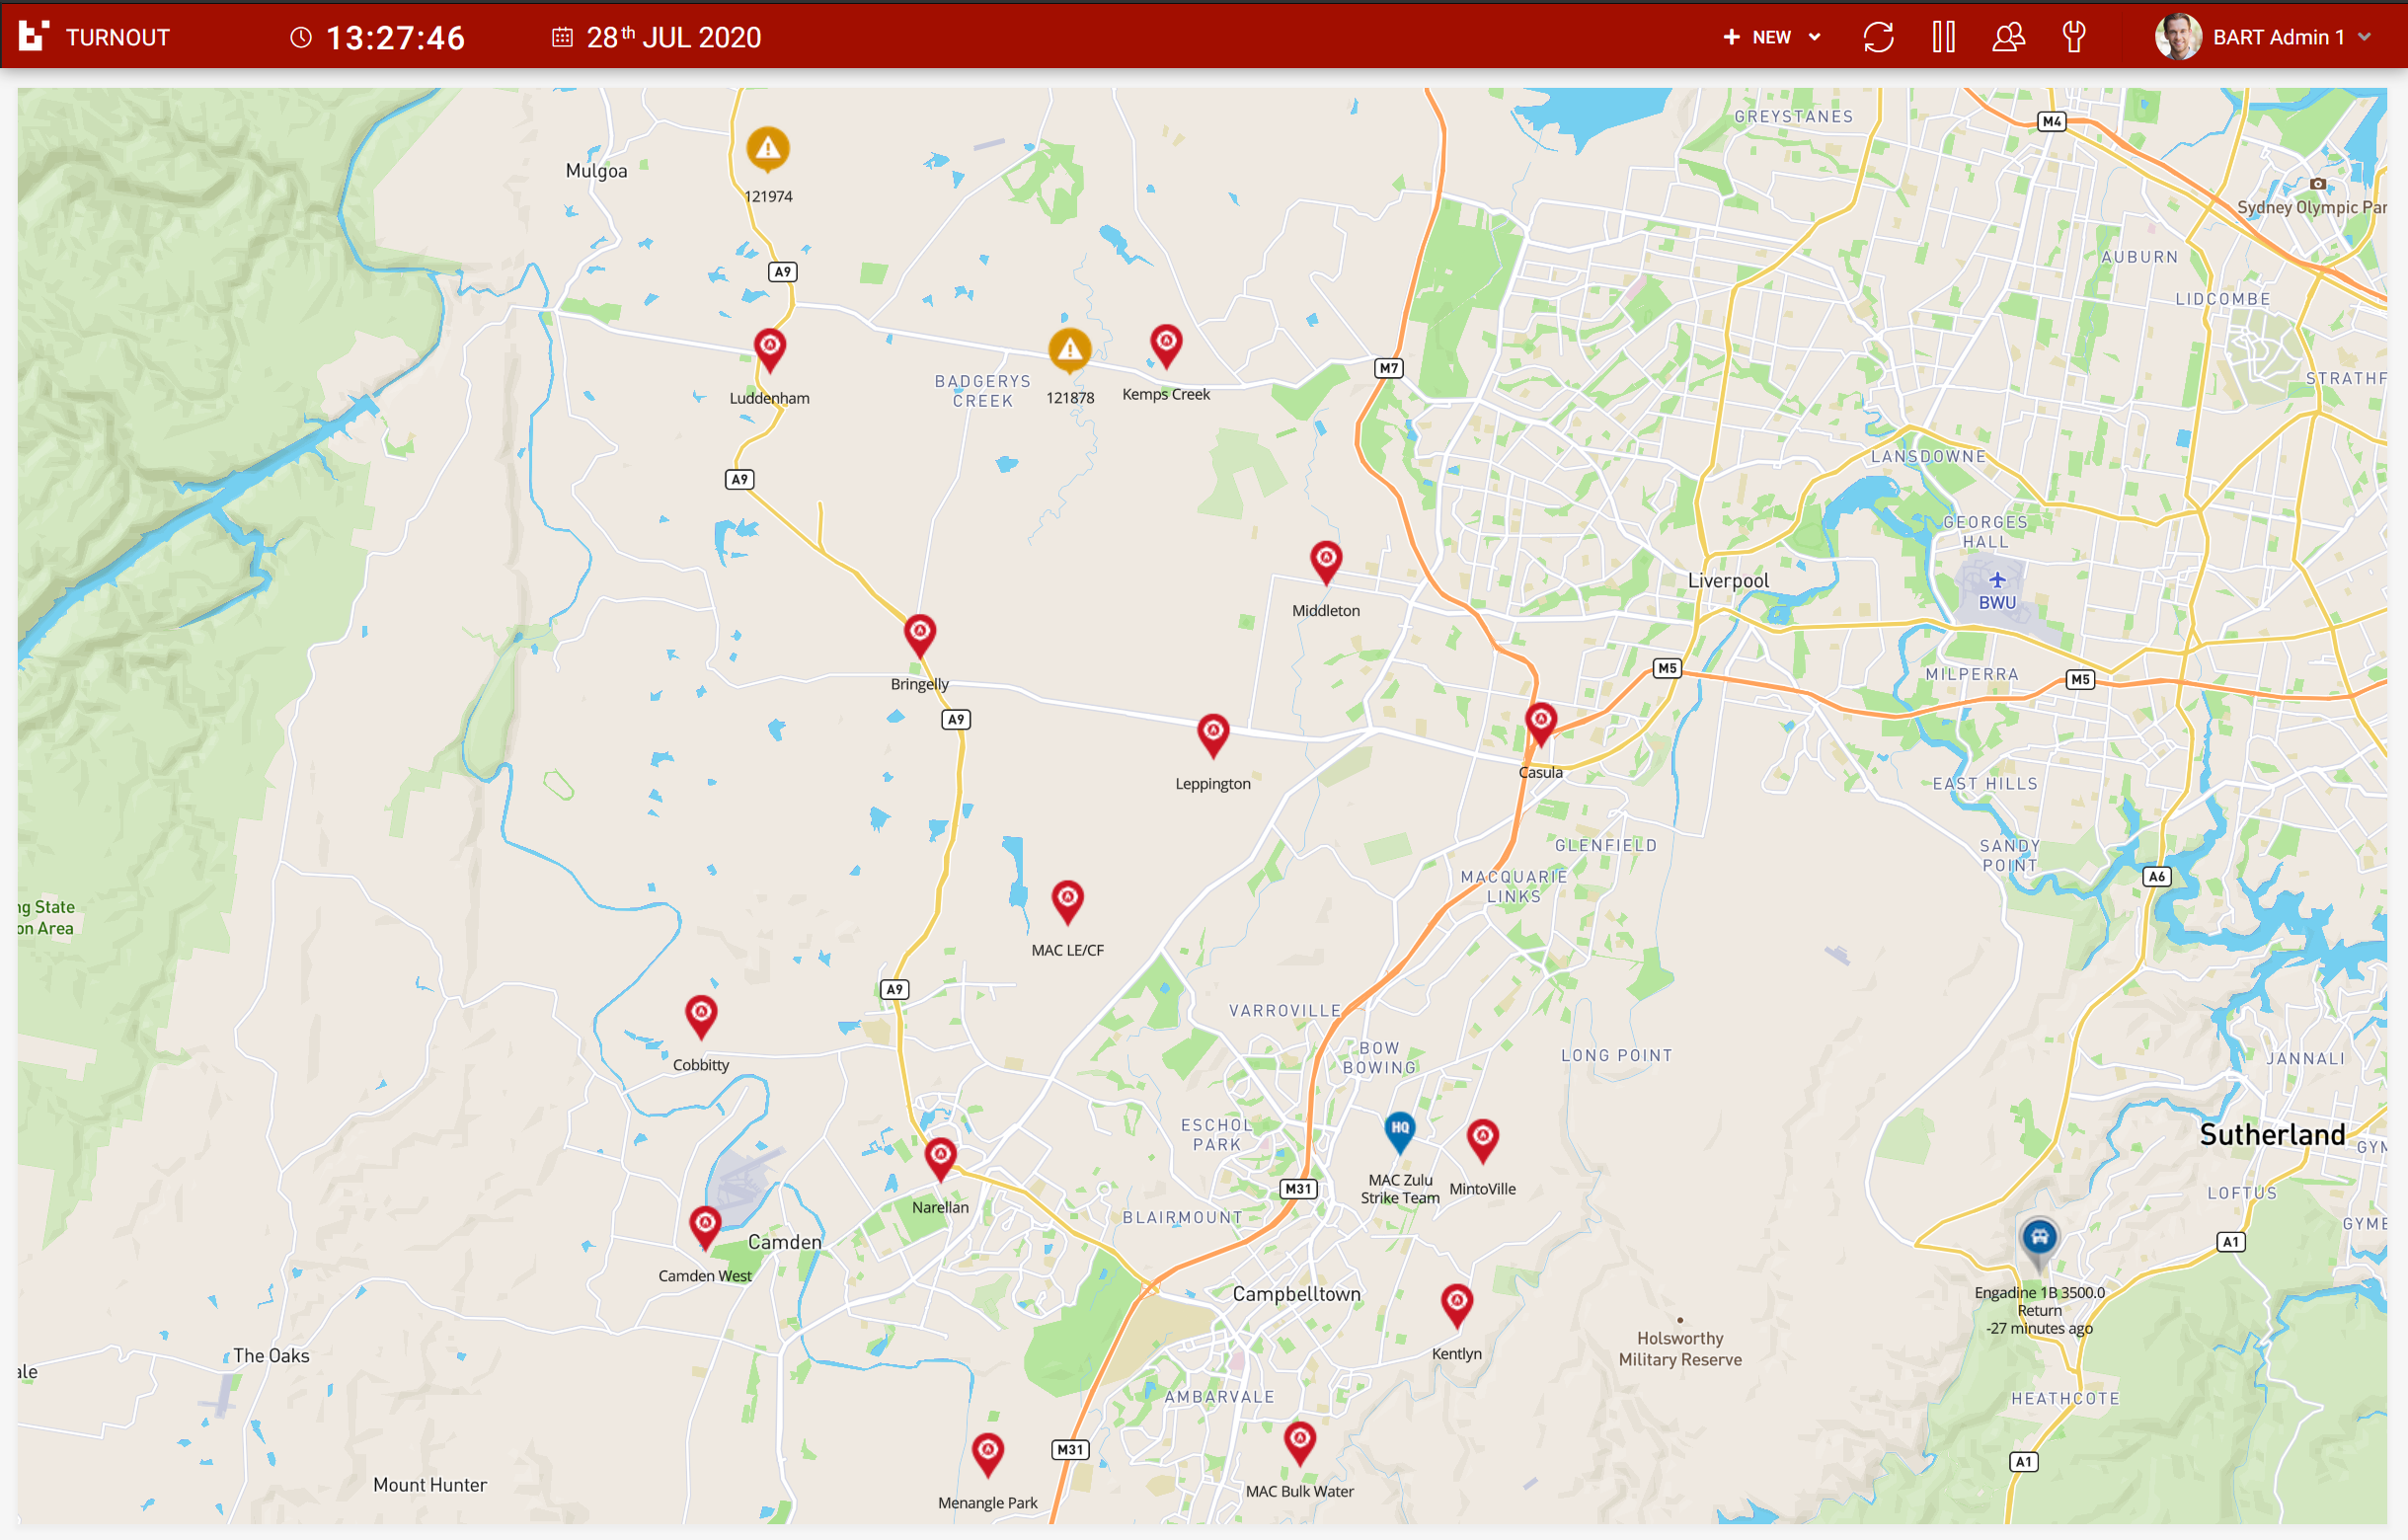
Map View
In the map view, you can see all the current incidents within the selected District. If enabled, you will also see the location of all headquarters within your District. If you have active appliances, you can also see their location and current status within the map.
Layout Options
The Turnout interface can be configured to display:
- Full screen incident list
- Full screen map
- Half incident list, half map
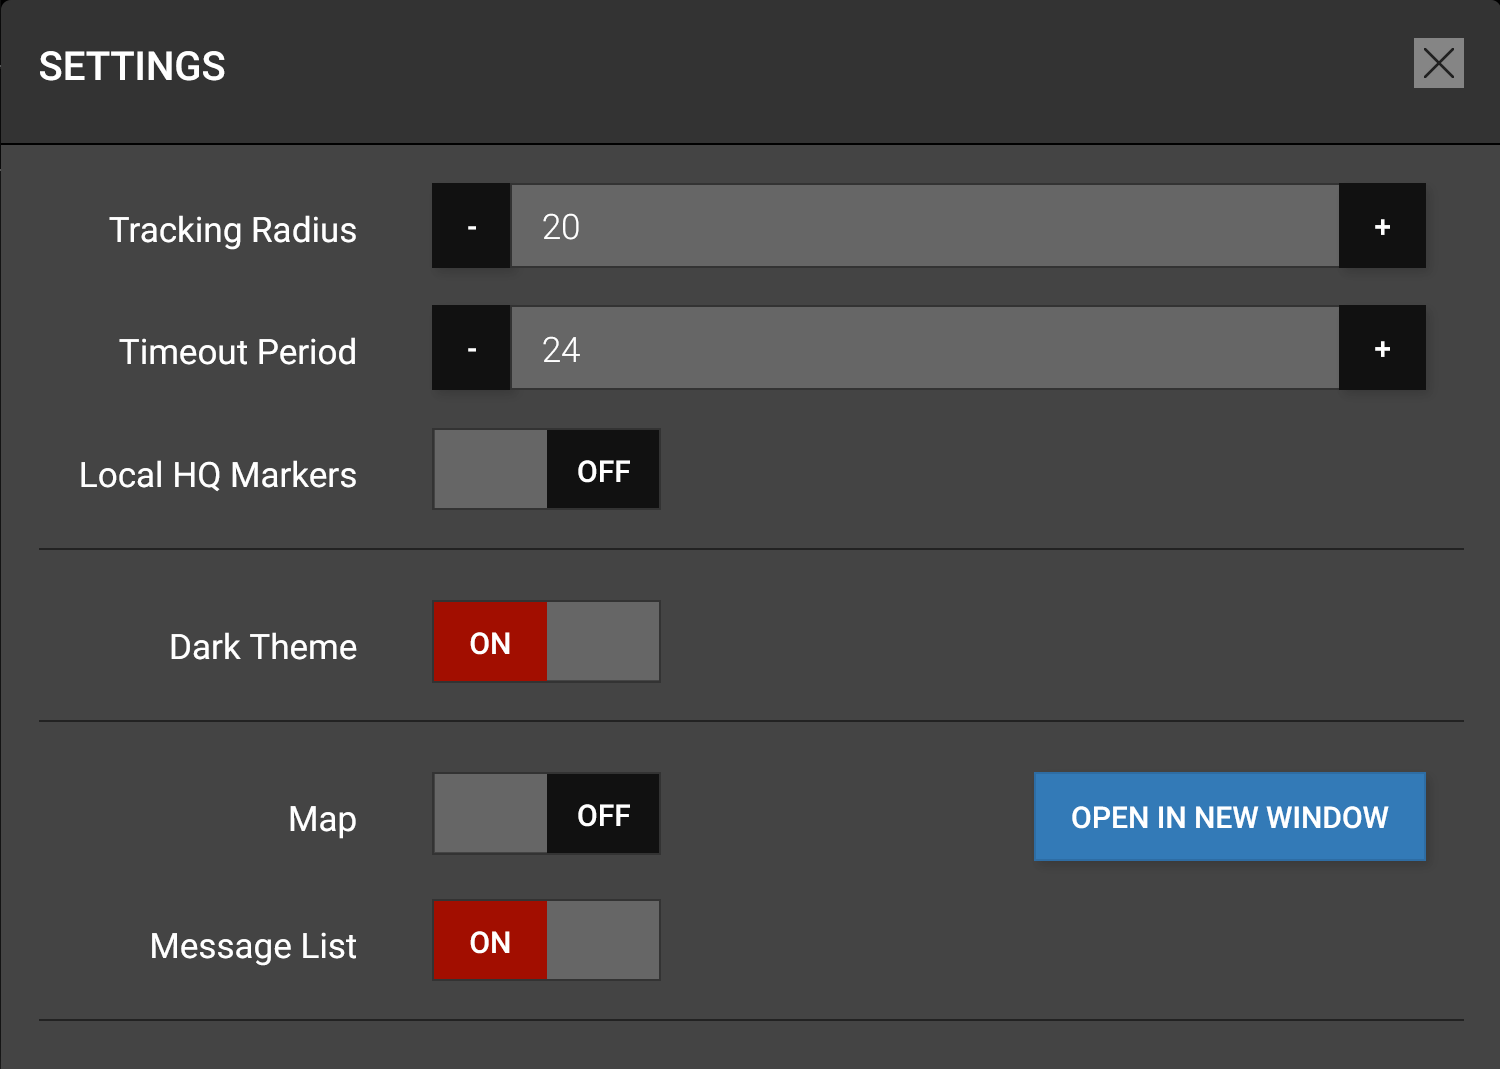
The layout can be adjusted in the settings popup, which is accessed by clicking on the settings button in the top menu:

In the settings popup, you can use the toggles provided to turn both the map and message list on or off. You also have the option of opening the map in a new window:

Other Options
When clicking on the 'Settings' icon in the top banner, you will also have the option to set your:
- Tracking Radius - use the slider to set the tracking radius (between 0 and 250 kilometres)
- Timeout Period - use the slider to set the age of incidents displayed (between 1 and 48 hours)
- Local HQ Markers - use the toggle to enable or disable headquarters markers to be displayed in the map
- Dark Theme - use the toggle to enable or disable the Dark Mode interface