Raspberry Pi Setup
The Dashboard is commonly setup with a large screen, providing members with a way to see what’s going on – without having to look at the BART Team app on their individual devices.
Equipment
To run the Dashboard at your local headquarters, you'll need a computer with a current web browser installed - we recommend Google Chrome or you can use our Android Smart TV app.
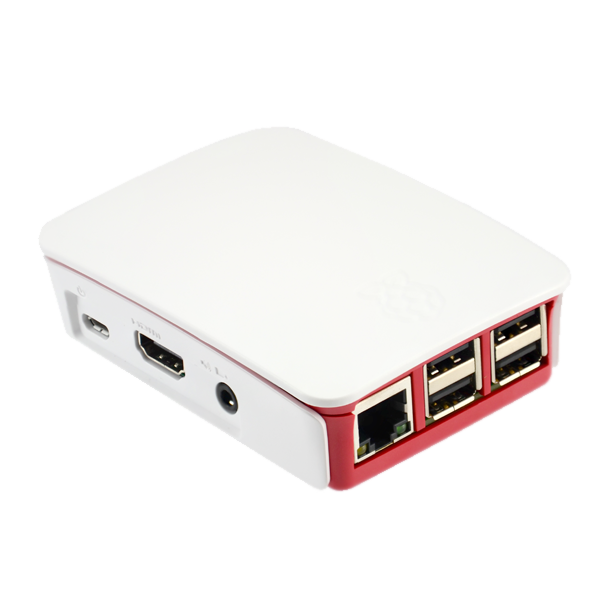
One cost effective solution that we recommend, is using a Raspberry Pi unit alongside a wall-mounted television screen. The Raspberry Pi is a credit card sized computer that has ports for USB devices like a keyboard and mouse, Ethernet and HDMI ports for network access and displays, and other peripheral connection.
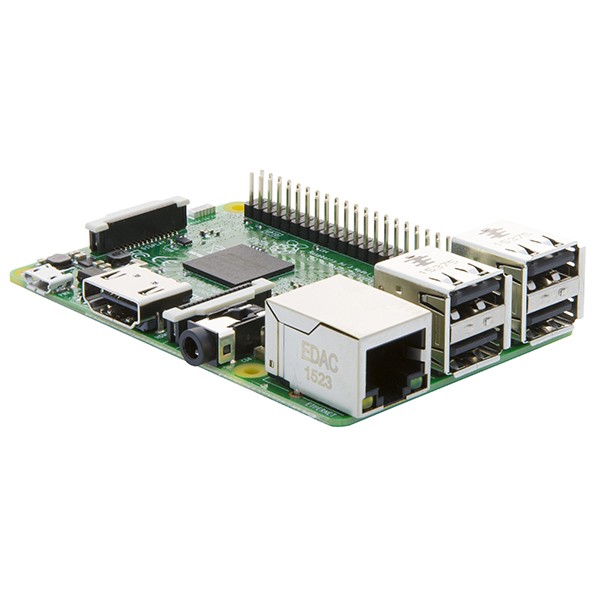
Recommended Model: We recommend the 'Raspberry Pi 4 Model B' with 2GB of RAM
Raspberry Pi Image URL's
If you have experience in Raspberry Pi’s and would prefer to load the image onto your own SD card, you can download it for your timezone below:
Connect your Raspberry Pi to WiFi
Many headquarters using the BART Dashboard have several TV monitors mounted onto walls. An easy and reasonably inexpensive way to drive the BART Dashboard is using the Raspberry Pi with its built-in WiFi connectivity.
To connect your Raspberry Pi to your chosen WIFI connection:
1. Purchase a Raspberry Pi 3 or later model, which has built in WIFI
2. Ensure you also get a power supply and HDMI cable
3. Contact the BART team to get your pre-loaded Micro SD card
4. Plug in a monitor, keyboard and mouse to the Raspberry Pi
5. Once booted into the dashboard press 'Ctrl Alt and F2' together to get to the console.
6. Type in ‘raspberry’ as the password
7. Type 'sudo nano /etc/wpa_supplicant/wpa_supplicant.conf'
8. You should see in the config file:
9. You must remove the # under ‘network’ and enter the ssid (WiFi name) and psk (password):
10. By deleting the single hash (#) characters at the front of the settings you choose, will change the lines from being text notes to active code
11. Be careful not to remove the “ ” (double quotation marks)
12. Save file by holding together 'Ctrl + X' and confirm by typing ‘Y’
13. Reboot Raspberry Pi by power cycling or typing “sudo reboot”
14. If your WiFi details are correct, the BART screen will boot up and you will be away and running
15. If the BART screen doesn’t boot up in a short amount of time, you will need to check your WiFi modem for the correct login type and details
Update the Time Zone on Raspberry Pi
1. Press together crl + alt + F1 (You should now see a command line)
2. Login using the following:
Login: pi
Password: raspberry
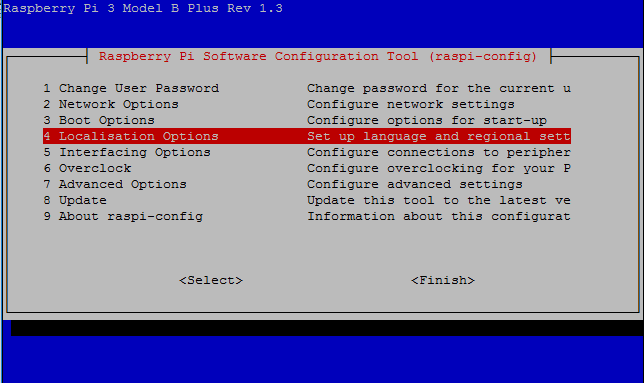
3. Type: sudo raspi-config (You should now see a configuration menu)
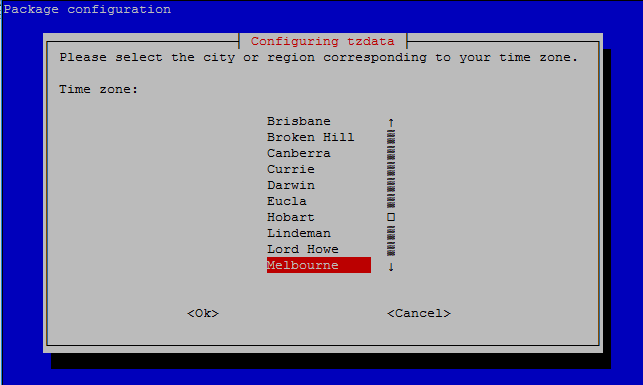
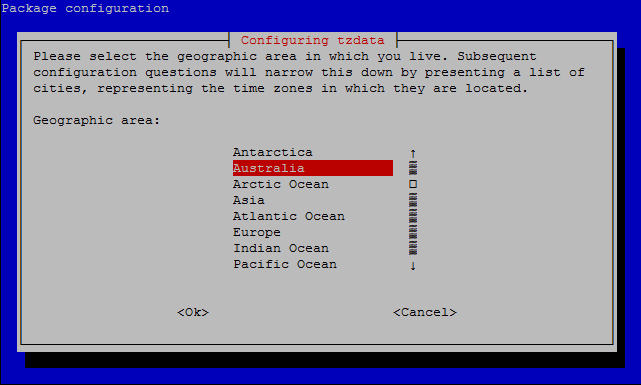
4. Go to localisation Options > Change Timezone
5. Choose Australia, then your nearest capital city
6. Hit Enter, then power cycle your raspberry pi
Steps to Change BART Dashboard URL in Raspberry Pi
1. Control + Alt + F2 to enter command line
2. Enter default pi login details:
Username: pi
Password: raspberry
3. Run command: echo https://bartapp.net/webapp/dashboard > /boot/fullpagedashboard.txt
4. Run command: echo https://bartapp.net/webapp/dashboard > /boot/fullpageos.txt
5. Reboot Raspberry Pi by issuing reboot command: sudo reboot now